Navigation: Basic Working Procedures > Purchase Management > Purchase Orders > Display the Purchase Order Details Screen >
General Tab


|
Navigation: Basic Working Procedures > Purchase Management > Purchase Orders > Display the Purchase Order Details Screen > General Tab |
|
The General Tab collects the basic information regarding the Purchase Order.
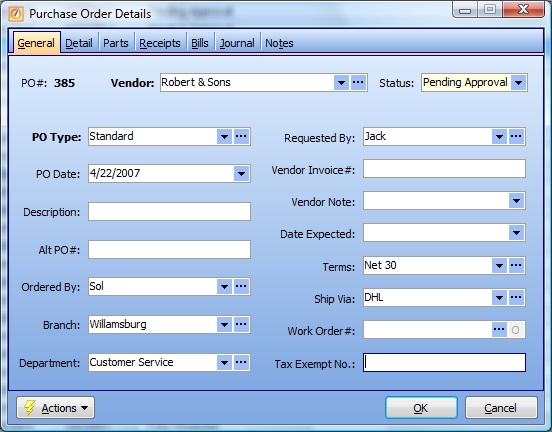
There are Controls for Purchase Orders that can be entered either in the General Header or at the Parts Detail Line. These simple but powerful entries are part of the secret of avoiding duplicate entry as they link the Purchase Order as a whole (or only certain Part Details) to managing PO Receipts, and historical data captured there. The Control fields are:
| • | Date Expected |
| • | Work Order # |
| ► | If you use one of these Controls in the General Header, the value supplies the default to all the individual Part details, where you can override the default. |
| ► | If filled in the Detail Line, the value works for that Part Detail only, and acts as an override to any Header entry. |
Fields: (For help with data entry, see Field Select Boxes and Field Helpers.)
Header:
Vendor:
Required. The Vendor who will fill this Purchase Order. (See Lookup Combo Box. To add an entry, click the Ellipsis button ( ) and select New.)
Protected. For a new PO the status will be set by default, according the value in the Company Preferences, Purchasing Tab, which determines whether Approval is required:
| • | Pending Approval - must be approved by an Employee authorized in the Employee, Security Tab. (To Approve a PO, click on Actions and select Approve PO.) Once approved the status changes to Pending Receipt. |
| • | Pending Receipt - Approval not required, or has been granted. |
The remaining Status values display as the Purchase Order progresses through its stages:
| • | Partially Received - Some Part detail lines received, but not all. Or, individual Part details may still have outstanding quantity on Back Order. (See Receipts Tab.) |
| • | Fully Received - The Purchase Receipts task is complete. (See Receipts Tab.) |
| • | Fully Billed - All Vendor Invoices for all Part detail lines have been received and recorded. (See Bills Tab.) |
| • | Canceled - If no Receipts yet, then for any reason you can click the Actions button and select Cancel PO. |
PO Type:
Required. The Purchase Order Type categorizes Purchase Orders into similar groups and allows you to set up standardized Report Templates. (See Lookup Combo Box. To add an entry, click the Ellipsis button ( ) and select New.)
PO Date:
Record the Date this Purchase Order was issued to the Vendor. (Click the down-arrow to use the Calendar Helper.)
Description:
Enter a short description that will help to identify this Purchase Order on Lookup screens, etc.
Alt PO #:
There may be an assigned Purchase Order for ordering from this Vendor, which you will want to use rather than the system-generated unique ID. Alt PO # is one of the columns on the Purchase Order Lookup screen.
Defaults to the Employee for the Logon User ID. You can change this.
Branch:
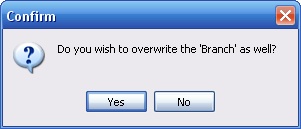
Defaults to the Company Branch for the Employee above. The Branch specified here supplies the default Ship-To Address on the Purchase Order Detail Tab, and supplies the default Stock Warehouse for Inventory updates.
If you change the Employee value above, a Confirmation message appears:
Department:
Defaults to the Department for the Employee above. If you change the Employee value above this value also changes.
Right Column:
Requested By:
You may wish to keep a record of the Employee who requested this Purchase Order. (See Lookup Combo Box. To add an entry, click the Ellipsis button ( ) and select New.)
Vendor Invoice #:
The Vendor may have specified the Invoice Number to used, related to this Purchase Order.
Vendor Note:
Depending on negotiations before issuing the Purchase Order (see PO Quotes), you may need to store a note about this Purchase Order. (See Drop-Down Text Helper.)
Optional - Control (See Controls above.)
Very powerful, if used. The arrival date predicted by the Vendor. The Date Expected controls the Purchase Orders displayed on the Office Manager Parts Expected Tab, where Receipts are managed.
(See the related Control for this value on the Parts Tab for the detail line.)
The Payment Terms expected by this Vendor. (See Lookup Combo Box. To add an entry, click the Ellipsis button ( ) and select New.)
Ship Via:
The Ship Via Type. (See Lookup Combo Box. To add an entry, click the Ellipsis button ( ) and select New.)
Optional - Control (See Controls above.)
Very powerful, if used. Links this Purchase Order to a specific Work Order so that Parts received, instead of going to Inventory Stock, will transfer with all their Costing information directly to the Work Order.
Select only Work Orders that have not been Canceled.
(See Search and Open. The Ellipsis button ( ) opens the Lookup screen, the Open Icon (O) opens the entry itself for review.)
(See the related Control for this value on the Parts Tab for the detail line.)
Tax Exempt No:
If the Job Site is Tax Exempt, the default here is its Tax Exempt Number. You can make changes.
Page url: http://www.fieldone.com/startech/help/index.html?_purchmanage_purchorders_screen_general_tab_.htm