Navigation: Basic Working Procedures > Work Orders > Display Work Order Details Screen > Items Tab >
Items Tab - Line Groups


|
Navigation: Basic Working Procedures > Work Orders > Display Work Order Details Screen > Items Tab > Items Tab - Line Groups |
|
Line Groups allow you to suppress and/or combine print lines for either Parts or Labor into a single printed line seen by the Customer.
Note: in order to make a line unprintable, either include it in a Line Group as described here, or, set the Sale Amount to $0.00. Also, make sure that the Print check-box for the detail line is unchecked.
For a Project, Line Groups are prepared on the Estimate Items Sub-Tab, and appear on both the printed Estimate and also the Invoice, which is based on the Estimate.
For a Service Call, since billing is based on Time and Materials and there is no Estimate, Line Groups can be prepared at any point where Parts and Labor can be added, and only affect the printed Invoice.
There are four places where some form of the Items Tab is available. For Projects, the check-box to Show Line Groups is enabled only on the Estimate Items Sub-Tab. For Service Calls (which have no Estimate) the check-box is enabled at all places where Items can be added:
| 1. | Estimate Items Sub-Tab - Projects only |
| 2. | Work Order, Items Tab - Service Calls only |
| 3. | Schedule Slot Detail, Items Tab - Service Calls only |
| 4. | Posting Detail, Items Tab - Service Calls only |
Here are the steps to use Line Groups:
| 1. | Click all the Part or Labor transaction lines that you wish to associate with a Line Group, and first make sure on the right-hand editing panel, in the Other section, that the Print box is unchecked. |
| 2. | Check the Show Line Groups box under the New Part button at the bottom left (see Items Tab Navigation). Then select the New Group button just to the right. On the right side of the screen two new panels will appear for Line Group Details. |
| 3. | Fill in the top panel for Line Group Details: |
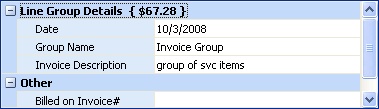
One of the predefined Line Group Types. (See Simple Lookup Box.)
Estimate or Invoice Description:
Either the default Description for the Group, or you can enter whatever you wish to print for the Customer
Job Stage:
(For Project Estimates only.)The Job Stage for this Project for which this Line Group will print.
| 4. | Then in the lower panel, select all Parts and Labor detail lines that you have prepared to associate with this Line Group (by un-checking the Print box). Use the check box at the left of the item. |

Note: Use Select All and Clear All buttons at the bottom right, to help add details quickly.
| 5. | To finish entering the Line Group, use the Entry check-mark Icon at the bottom left of the Transactions screen. (See Data Entry Icons for control of detail line maintenance.) |
Note: Parts and Labor details will be attached to the Line Group only after the Group has been entered, or you move on to the next record.
Page url: http://www.fieldone.com/startech/help/index.html?_work_order_screen_itemstab_line_groups_.htm