The actions to Take Charge of Alerts are very intuitive, especially once you understand the fields used when you Set up an Alert, the triggers and controls:
Use the Alert pop-up:
When the Alert pop-up appears, you can click on any of the following actions listed in blue on the popup menu:
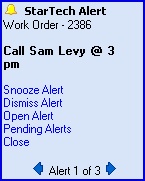
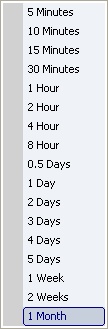
| 1. | Snooze Alert: Just like an alarm clock! To postpone the Alert, click Snooze and then select and click on the time interval you want for delay. |
| • | This Alert will disappear from the pop-up and the pop-up will close if this is the only Alert |
| • | Its Remind Time will be reset according to your choice |
| • | The Pending Alerts caption on Status Bar will blink red, even if the pop-up disappears |
| • | The pop-up (or this Alert among others on the pop-up) will reappear when the snoozed time has elapsed. |
| 2. | Dismiss Alert: Click here to dismiss (inactivate) the Alert. |
| • | This Alert will disappear from the pop-up and the pop-up will close if this is the only Alert |
| • | The Active Flag on the Tasks Sub-Tab for this Alert is set to Inactive (empty) |
| • | Note that this detail may no longer display on the Tasks Sub-Tab, depending on the Uncompleted Only box on that screen. |
| • | To reactivate an Alert that has been Dismissed: |
| 2. | Set the Uncompleted Only box to empty so that Inactive Tasks will show |
| 3. | When the Task detail for the Alert appears, set the Active Flag back on |
| 3. | Open Alert: Click here to open the Tasks Sub-Tab containing the Task which set this Alert. |
| 4. | Pending Alert: Click here to open the Pending Alerts screen with a list of all currently Pending Alerts. See below for further explanation. |
| 5. | Close: Click here to close the pop-up window. |
| 1. | The Alert pop-up will disappear. |
| 2. | If Alerts remain, the Pending Alerts caption on Status Bar will blink red. |
| 3. | Click on the Pending Alerts caption to open the Pending Alerts screen and control Alerts. |
| 4. | However the pop-up will not reappear until you exit and later re-enter the program. |
Use the Pending Alerts screen:
The Pending Alerts screen shows all Pending Alerts set for you.
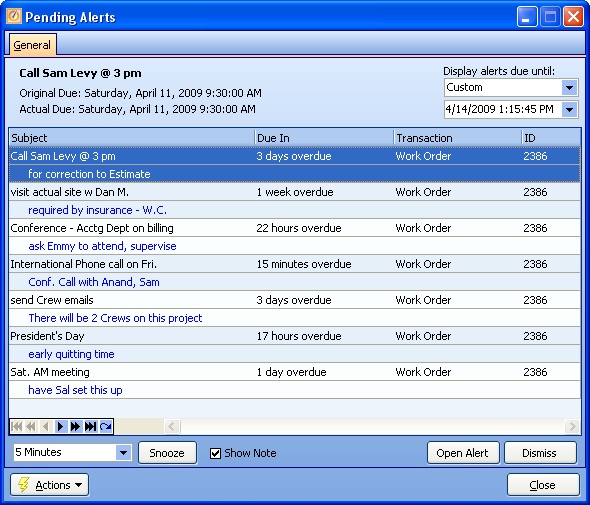
This screen, with multiple details, is a DataView, where you can adjust the layout, print or export the data (see DataView Menu). There may also be a header panel above for the "parent" of the details, or a DataView Footer below. Usually you can use key-matching search on fields like ID Number.
Screen Header:
| • | Left - Notice that the header section displays more information about the Alert selected from the details below. |
| • | Right - here you control the Alerts displayed by setting the Time to be compared to their Remind Time: |
| 1. | In the Simple Lookup Box called Display Alerts due until, choose either Now or Custom. |
Buttons to Control Alert details:
At the bottom of the screen, there are various controls, described from left to right:
| ► | Select the Alert detail from the list of details |
| ► | Click the Snooze button at the bottom left |
| • | Show Note check-box - use to display (in blue) the Note Text attached to each Alert on the detail screen, as shown in the illustration above. |
| • | Open button - to open an Alert on its Tasks Sub-Tab: |
| ► | Select the Alert detail and click the Open Alert button at bottom right |
| ► | Or, double-click on a selected Alert detail |
| • | Dismiss Alert button (set the Active Flag to Inactive): |
| ► | A single Alert - select the Alert detail and click the Dismiss button at bottom right |
| ► | All Alerts - use the Actions Menu and select Dismiss All |
Page url: http://www.fieldone.com/startech/help/index.html?_tasks_and_alerts_take_charge_.htm


